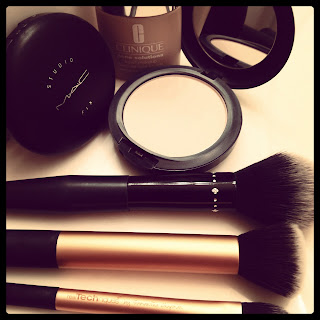
There are some people in this world with perfect skin. No blemishes, even complexion, and a perfectly smooth face. I, personally, know nothing about this perfect skin I speak of. I haven't had perfect skin since I was a child! I do however know how to create the illusion of a smooth and flawless complexion. As with any project, which is what I consider my face to be when covering up flaws ha ha, you have to start at the base and work your way up. Have you ever built a house? Me neither! But you can't build a house without putting down a foundation, right? That's kinda how I think of things when putting on makeup. Foundation is always the first step I take, the base of for the rest of my makeup.
I'm going to jump right into the point of this blog, showing you the easiest way I have found to create a smooth face. I'll make this short, sweet, and as pain free as possible. It really is quite simple. You just need a few things. Go ahead and grab your liquid foundation, setting powder, a round flat top brush, and a big fluffy brush.
First, put a small amount of liquid foundation on the back of your least dominant hand. Remember, foundation can appear caked on if too much is used, so start out with only a small amount. You can always use more if you find that you don't have enough, but removing foundation because you have used too much is a pain! Grab your flat top foundation brush and gently dab it into the foundation on the back of your hand.

With the foundation you have picked up on your brush, gently dab the brush completely over one section of your face at a time, this is also known as stippling. This helps to distribute your foundation evenly in a dot-like manner. Once you have evenly distributed the foundation onto a section of your face, you will need to blend/buff it out to create a smooth finish. Liquid foundation can sometimes dry quickly, which is why it is important to do one section at a time. Continue this process on the remaining sections of your face, being careful not to use too much. It is important to blend out a little bit past your jawline and as close to your hairline as possible to avoid the mask look.

Once you have blended out your liquid foundation smoothly, you will then need to grab a setting powder to match and big fluffy brush. Again, doing one section at a time, apply powder with a fluffy brush in long sweeping motions. When you are finished with each section use your fluffy brush to blend it all together. Using a powder after you have applied liquid helps to keep the liquid in the same spot you put it. It does this by absorbing oil that is naturally produced by your skin, oil that can cause makeup to slide around on your face.
And that my friends, is all there is to it! Sounds easy right? Well, it is! Allow yourself some time to master the art of foundation. Practice makes perfect! It may not look perfect the first few times you try it, but stick with it. There are many techniques and many tools that can be used when applying foundation, this is just the easiest way I have found to do it.


